The Complete Vyond Tutorial

This is a complete tutorial on Vyond.
In this new guide you’ll learn everything about the drag n’ drop animation software Vyond, including:
- Key features
- Real-life use cases
- Advanced tips
- How Vyond compares to similar animation software (like Powtoon)
- Lots more
So if you want to get the most out of Vyond, this tutorial is your guide.
Let’s get started!
Contents

Chapter 1
Intro to Vyond Studio

Chapter 2
Basic Functionality

Chapter 3
Real-life Use Cases

Chapter 4
Vyond Time Savers

Chapter 5
Go Beyond Vyond

Bonus Chapter
Video Structure Fundamentals
CHAPTER 1:

Intro to Vyond
What is Vyond?
Vyond is an online tool for making animated videos.
It makes it fast and easy to create videos from libraries of characters, objects and effects.

Vyond has pretty much revolutionized the animation industry—allowing non-technical e-learners, marketers and trainers to create animated video.
The company was founded in 2007 by Alvin Hung, which he called GoAnimate back then.

According to LinkedIn, Vyond has 92 employees at the point where this Vyond tutorial is written—and customers from around the world.
What is Vyond Used For?
Vyond is used for creating commercials, social media content, training, e-learning, courses and much more.
I talked to one of the marketing heads at Vyond, and she said that the majority of their customers use Vyond Studio for creating their e-learning material.

To some degree, Vyond replaces the need for animating in tools like Adobe AfterEffect, which is much harder to learn than Vyond.
Therefore, Vyond is widely used for creating presentations and infomercials by non-technical users.
Marketing, courses, social media content, education—the possibilities are limitless. It’s “just” a tool—what you do with it is up to you.
How Much is Vyond?
Vyond is subscription based, which means you pay a monthly or yearly fee to have access to the tool.
As I write this Vyond tutorial, the monthly Vyond pricing packages start at $49/month for the Essential. Then bumps up to $89/month, if you want to go Premium. And the biggest package is $159/month for a Professional subscription.

I use the Premium package, because I think Essential is too limited in functionality—and I don’t need the Professional’s team functions.
So expect to pay around $89/month, if you want access to the full palette of features.
Yeah; and there’s no Vyond lifetime deal out there, even though I see the searches for it.
You have to decide whether Vyond is for you or not—then subscribe on a monthly or yearly basis to get your hands on it.
Make sure to check out the full list of features included in each package on the pricing page before making up your mind.
Can I download Vyond software?
No, unfortunately, you can’t.
Vyond is 100% cloud-based, which means you need an internet connection and a browser to use the tool.
Therefore, you want to check your internet connect speed before you go for a subscription for Vyond.
Use a service like Fast.com to check your connection.

Anything above 100 Mbps is good enough to use Vyond smoothly.
So:
Fast internet is important when using cloud-based animation tools.
But not all animation software or browser based.
Let’s look into some Vyond alternatives!
What are some Vyond alternatives?
Vyond is not alone in the drag n’ drop animation space.
Naturally, this is a market where several similar tools have emerged the last couple of years.

The demand for easy video creation is only increasing, so the competition is also getting harder.
In my opinion (after having researched this thoroughly), Vyond is the most professional tool.
Why?
Because it comes closest to “real” professional tools like Adobe AfterEffects in terms of functionality and stylistic aspects.

But we are looking for faster, more efficient ways to produce videos than After Effects, right?
So what are some serious alternatives to Vyond.
Let’s take a look:
1. Powtoon
Powtoon is an animation software made for creating animated presentations and explainer videos.
The tool has a lot in common with Vyond in terms of features, templates and user interface.
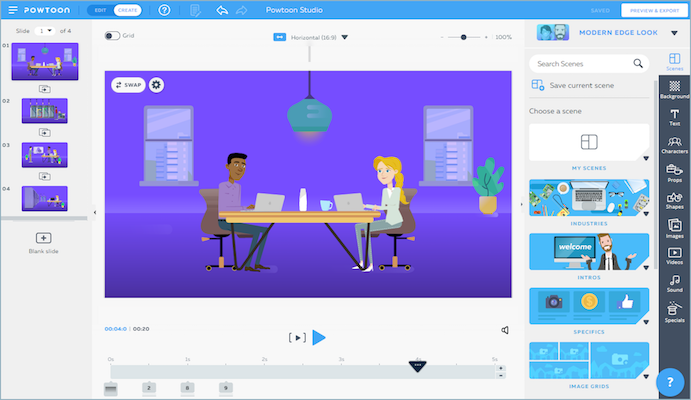
I’ve seen users choosing Powtoon over Vyond because of the lower pricing, but my overall assessment is that Vyond is the better choice.
If you’re interested:
I’ve made a video comparison of Vyond and Powtoon that goes a bit deeper into some of the core differences:
2. Videoscribe
Videoscribe is an animation tool that focuses more on whiteboard videos.

It’s fairly cheap, compared to heavier tool, and therefore it’s very popular among non-professional users, like Youtubers.
3. Toonly
Toonly is a video maker that has a good looking style and the most essential functionalities.

What’s different about Toonly is that you can download it to your mac or pc—and use it without an internet connection.
BUT:
You can Google your way to other Vyond alternatives if you’re interested.
This tutorial is about my favorite—the number 1 in the game: Vyond.
So let’s jump to the next section on how to get started!
CHAPTER 2:

Basics of Vyond
It’s pretty quick to master the basics of Vyond.
Within 30 minutes, you can get an overview of the interface of the tool.
And in a couple of hours, you will understand the different functionalities of the program.
And after a few days, you’re ready to put out professional videos.
Let’s dive into how it’s done!
(You can also watch this guide as a video playlist—have fun!)
Creating a new project
In order to get started, you need to create a new project.
This is done by logging into your Vyond account and clicking ‘Make a video’.
Now, you’re asked to select a style.

As you can see, there are 3 styles to choose from;
- Contemporary
- Business Friendly
- Whiteboard animation
Contemporary
This is a rather new and modern style designed in a minimalistic and “flat” way.

It’s great for explainer videos, where you want to align the look of the video to your brand.
This theme allows for lots of customization of objects i.e. changing the colors of a house, a car or desk.
So you can make everything look like “yours”.
Business Friendly
This style is more detailed and “human-like”, and the characters have a more expression to their faces.

Business Friendly is more commonly used than Contemporary, because more users only have access to this animation style.
You need to have a Premium subscription or higher to get access to Contemporary.
So, Business Friendly is a popular style among Essential subscribers.
Whiteboard Animation
Last style is Whiteboard Animation. It’s a design that seeks to imitate how drawing on a whiteboard looks like.

You just choose the elements to include. And Vyond will create an animated path for the hand to follow.
This makes it look like a real hand is drawing the elements you choose.
This style is great for training videos, explainers, tutorials and similar.
Why?
Because the drawing hand is almost hypnotising – combined with a voice-over that talks about what the hand is drawing.
(Much more engaging than a static 100 page PDF, right?)
Oh, almost forgot:
I actually made a video with examples of each Vyond style.
So if you want to see the 3 different styles in action, here’s 5 real-life cases—all made entirely in Vyond:
Now that you’ve chosen a style, you’re ready to get familiar with the Vyond Studio Editor.
Let’s take a quick tour!
Vyond Studio Editor
The Editor is where you do the work.
It’s where you find the canvas, timeline, libraries, effects and much more.
Let’s take a look at the most important parts of the editor:

1. Canvas
What you see here is what you get. The Canvas shows you how the video looks right at this moment. This is also where you drag and drop new props, position and size elements and everything else, really.
2. Timeline
The big picture. Your Timeline is your overview of all scenes in your video. What comes next? How long is the scene? What music and sound effects play when? You can also use the Timeline to rearrange scenes and add new ones.
3. Libraries
Populate your scenes using these libraries of uploaded stuff, characters, props, charts, text and audio. Each library is divided into meaningful categories. Pretty neat, when you want to find that “robot dog” in there.
4. Scene Settings
In your scene settings, you make changes to the scene, you are looking at right now. Make a prop fly in from the left, add camera movement or change the background color. This is where everything is animated and comes to life.
5. Views
Want to see the whole scene as it is? Or maybe a view of all the elements included in that scene? These views save you time in your process. And, you can zoom way into a scene, if you want to precisely position that logo on a highway billboard.
6. Controls
These controls are the same as you know from programs like Word, Excel, etc. Copy, Paste, Undo, Redo. Once you get familiar with the program and learn the keyboard-shortcuts (CMD+C, CMD+V, etc), you won’t be mouse clicking much up here anymore.
A lot to remember?
Well, you’ll quickly get the hang of the Editor once you start using it.
Just click around, don’t be afraid of opening and closing stuff.
Now, something very useful (that you actually can’t see right in the Editor) are Right Click Functions.
In the next section of this Vyond tutorial, I’ll quickly explain what they can do for you!
Let’s take a look.
Right Click Functions
As in many types of software, right-click somewhere opens up an extra menu of cool options.
In Vyond, it’s exactly the same.
But, what are they? And what you can use them for?
Let me briefly run you through each one.

The first of the two main places, you can use right-click functions is on characters and props.
When you right-click on e.g. a character (like I have above), you get these options:
- Copy
Make a copy of this guy.
- Paste
Paste what you’ve already copied.
- Group
If you select 2 or more elements, you can “glue” them together and move everything around as one unit.
- Crop
Want to cut of his head? Use crop to select only a part of the character or prop (a prop is just another word for object/thing/element).
- Flip Action
If this guy was dancing, you could flip his dance without flipping e.g. his hair or clothing.
- Mirror
Flip the whole thing, including his hair and clothing.
- Bring to Front
Think of all elements as layered on top of each other. This option brings our guy to the very front – on top of the desk, computer and everything.
- Move Forward
Similar, but this only moves our guy one layer closer to the front. (Soon, you’ll be using keyboard shortcuts for these actions).
- Move Backward
You’ve guessed it—this moves our guys backward through the layered elements in the scene.
- Send to Back
Sounds tragic, but it just moves our dear character to the very back of the scene. (Except for the background; backgrounds are always behind all elements of the scene.)
- Replace
Very cool feature; replace our guy with some other character (while maintaining his size, position, animations and action). This also works for Props, if you want to choose e.g. another screen for him to look at.
- Delete
Get rid of him. Out of the scene. (Backspace-button also works here.
General Right-Click Functions
I told you, there was another kind of right-click functions.
That’s true.
Although, I rarely use these. I use the keyboard-shortcuts instead.
As this is a Complete Vyond Tutorial, I want to run you through them quickly:

As you can see, I’ve right clicked on “the scene” as a whole.
No props selected. No characters right-clicked.
So what can I do now?
- Copy
Copy the whole scene. It’s like selecting the scene down in the Timeline and copying it there. (As I would normally do.) But you can also do it like this.
- Paste
Paste something you’ve copied in here. If you just copied a scene, pasting will force a new scene into the timeline, with all elements intact.
- Clear
Clear the scene for everything. Leave it white and blank. A clean slate for this particular scene.
- Delete
Next-level of “clear”. Delete the scene completely. Remove it from the Timeline.
These were the right-click functions.
Make friends with them. Because you’ll use them a lot.
The Timeline
The Timeline is one of the most important parts of the Vyond Studio Editor.
It’s your overview over scenes.
It’s where you alter the timing of animations.
And it’s where you’ll control audio clips and sound effects.

You can expand the Timeline to make it easy to see what’s going on.

It might look confusing, I know.
But quickly, you’ll get used to zooming in and out of the Timeline.
To drag animations back and forth. And to adjust the timing of everything.

It’s also on the Timeline, you add new scenes to your video.

You can add a scene by doing one of three things:
1. Choose a Template made by Vyond.
You can pick of the categories shown in the menu that pops up:

or search for something related to your context.

The other two options for adding a new scene are:
2. Continue Last Scene means that you create a new scene that takes off where the previous scene left. After all animations, but including all remaining elements.
3. Add Blank Scene is self-explanatory, right? It adds a blank, empty scene to the Timeline.
Now:
Let’s move on from basic functionalities to some real-life cases.
Videos made in Vyond. Nothing more—nothing less.
I’ll show some of the best ones, I’ve made over the years.
On to it!
CHAPTER 3:

Real-Life Use Cases
Vyond can be used for very basic videos.
And, it can be used to create professional videos as well.
Here are some Vyond-made videos to give you an idea about the possibilities.
Some are e-learning lessons, some are marketing related and some are Vyond’s own examples.
Use these cases to inspire your own creation in Vyond Studio.
Let’s have a look.
E-learning and Training
Vyond is great for e-learning and training videos.
Many of Vyond’s users work with HR and training of employees. And this is a field where Vyond really shines.
Here’s an example from my course “Strong Scripts“, where I’ve used Vyond to create a lesson using a few colors, characters and shapes.
Now, image using this in your own context:
With just a few elements locked in place (like brand colors, fonts and characters), you are able to design moving e-learning in no time.
I spent a day creating this video, FYI.
Another example:
This one is made by Vyond themselves.
A great example of a more corporate training video on a matter that employees NEED to understand.
Therefore:
A video is an awesome format. As many more will watch and understand this – compared to a boring, 50 page PDF file.
Let’s learn a bit about “information security”:
I think this is a great example of using characters, voice-over, a bit of text and a consistent color scheme to create something worth watching.
A last example of e-learning, I want to show you is my own attempt at explaining what “Value Marketing” is.
Back in 2018, I made this video, because I was tired of traditional spammy marketing.
It’s fast paced. Uses a lot of large shapes and texts. And I try to make it fun as well:
No matter what you’re “style” is, Vyond is a great tool when wanting to give life to a message.
Maybe you have a dry text file somewhere, you ask new employees to read.
(And they rarely do, right?)
Video is a way to make the dry information more digestible.
And within a few hours of Vyond training, you are fully equipped to make videos like the ones above.
Okay.
On to Vyond in a “marketing context”:
Marketing and Business
When I first started using Vyond, I was working a student job as “marketing assistant”.
So, my first attempt at Vyond was about explaining our product in a way that made viewers become customers.
(Not an easy task.)
But Vyond makes the ANIMATION part very easy.
Here’s an example of how you can use Vyond to explain the value proposition of business.
You see a lot of “screenshot” elements from the tool being explained, and a lot of imported icons, in beautiful combination with Vyond’s own characters and elements.
Speaking of elements:
Something you have to create your own elements (meaning props, objects, call it what you want).
And in this video, we had to create the moving “robot arm”—by using other shapes and props, and add motion to this elements.

Let’s see how it turned out in this explainer video for an IOT business:
Awesome!
Now, let’s watch a last example from Vyond themselves.
This is a marketing video made by the company to promote their tool.
It’s fast paced, funny and really well made, I think.
I hope his example videos gave you a better idea of what Vyond can do.
Or, that it inspired you to create videos like these for your own e-learning, training, marketing or business projects.
Great!
Then how do you make these videos in a fast way?
One of the main points made by Vyond is “time-saving”.
And I want to give you some input on what tips, tools and tricks you can use to speed up your process.
Let’s jump to the next section!
CHAPTER 4:

Vyond Time Savers
Vyond is a real time-saver in itself – compared to traditional video software.
But how do you speed up your video making process even more?
With:
- Scene and Video Templates
- Asset View
- And the “Two Tabs” Trick
Let’s look at the best functionalities for working smarter in Vyond.
Video Templates
The very biggest time saver of all is obvious.
Templates.
If you want to create a video around popular themes like customer support, on-boarding of new employees or remote work, you’re in luck.
Vyond as people employed who do nothing else but create awesome template videos for you.
In the top right corner hit “Help” → “Template Library.”

Here, you can search for a specific template—or use the filters to narrow down the catalogue.

To open a template in Vyond, so you can start making it your own, just click a video, then ‘Use this template’.

You are taken to Vyond Studio, where you can edit every single aspect of the video.

And this leads me to my next point:
Because how do you make this template video your own?
You probably want to change some overall aspects.
Like the colors. And the font.
You use something called “Asset View” for that.
Let me explain!
Asset View
Asset View is a huge time-saver.
In the bottom right corner hit “Stage View” → “Asset View”.

If you click Asset View (or use the keyboard shortcuts), you’ll see all assets included in this scene.

Pretty sweet, right?
Now you can replace, delete or alter any of the assets you want.
The real time-saver is when you select all scenes in the Timeline.
(Click the first scene, hold SHIFT, click the last scene)
THEN hit Asset View:

What you see now is all assets in the entire video.
Now, you can easily make changes to any asset – and it’ll get updated throughout the video.
Let me just show you how that works, exactly:
What a time-saver!
I most often use it to replace Characters and change colors of Props.
Within a few minutes of changes, you’ve made the template into your own custom video.
SO:
Template videos save you a lot of time. But only if there’s a video template that fits your need.
What if you are making your own video from scratch.
And just want a little inspiration for a single scene?
Then you’re in luck (again).
Let’s look into Scene Templates!
Scene Templates
Scene Templates are pre-made scenes for you to use in your video.
You can access Scene Templates from within the Editor (no need for leaving the engine room).
At the end of your Timeline hit “+” → “Choose Template…”

A menu opens up, where you can pick a category or search for something specific. (Just like the Template Library).
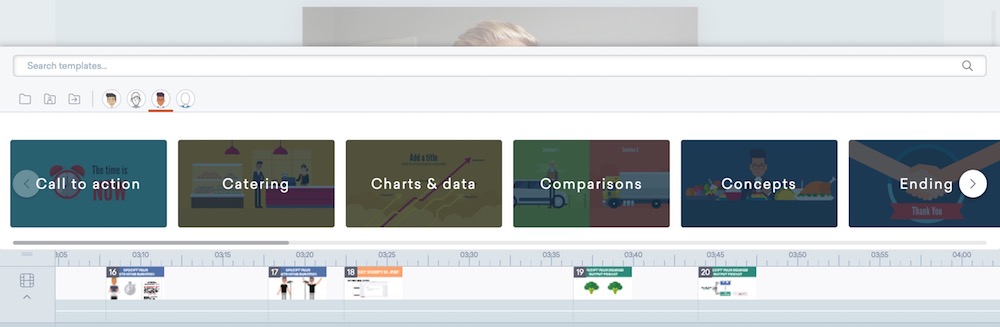
I suggest making changes to these template scenes (change colors, characters etc) to make them your own.
I use these Scene Templates a lot—both directly and just for inspiration on how to visualize something.
For an example, if I wanted ideas for how an office could look like.
I’d just search for “office” and look at the results:

Then click one of them and change or delete the parts I don’t like.
Or create a scene from scratch—with new ideas on how to visualize my office.
Well.
Now you know how to use Scene Templates.
Get familiar with the categories, so you know what’s there and what you have to make by yourself.
You can also save your scenes as personal templates for reuse.
Just right-click on the scene you want to ‘Save as Template’ on the Timeline.

Next time you want to use this template – made by you – you just click Add Scene and Choose Template.
(Just as if you were to use a Vyond-made template).
Now, go to “My Library” in the template menu.

And there it is.
Ready for “digital recycling”.
GREAT!
So far so good with the time-savers.
But, there’s actually a third way to reuse your scenes.
(This is actually even faster than creating custom templates.)
Let’s jump to next part of this Vyond tutorial, and I’ll explain it more in detail.
The "Two Tabs" Trick
The very fastest way to reuse something, you’ve made is the “Two Tabs” technique.
I call it this name, because you need two tabs open in your browser.
One has the video you are working on open.
The other has another video open that you want to copy something from.
Then, you just copy-paste a scene from one tab to the other.
Let me show how it’s done:
This has to be the fastest way to reuse scenes.
It’s a trick I use almost everyday—in order to save time on new videos.
If you’ve animated the scene once, then there’s no need to do it again.
Copy-paste between Vyond videos and wrap up your video in a matter of hours.
Okay.
Now it’s time to turn it up a little.
If you just want to know the basics, make fast videos and save time in the process, you’re good to go.
BUT:
If you want to take your Vyond skills to the next level, you want to stick around.
In the upcoming section, we’ll dive into some advanced techniques that will take you to the top 5% of Vyond animators out there.
Let’s get to it!
CHAPTER 5:

Go Beyond Vyond
When you master the basics, it’s time to go pro.
Vyond can be bent a little.
And if you think creatively, you can make videos that look super professional.
In this section, you are going to learn advanced techniques.
Let’s dive in!
Vyond Training
As I said, you could just stick to the basics.
But then again:
You came this far—why not go pro in Vyond Studio?
I don’t want to push my course too hard here, but here’s the truth:
If you are serious about Vyond, my course “Go Beyond Vyond” is the fastest shortcut to getting great at it.

If you want to save time and get the lessons spoon-fed, click the cover.
If you don’t have the money to spare, fine.
It’s also possible to spent a few days (or weeks) on Youtube and Vyond’s own website, learning from the good material there.
Next up:
In this next section, I’ll share some of the ideas in the advanced section of the course.
Create Your Own Props
Can’t find “flying robot dog” in the library?
Don’t worry about it.
Because, you can create any prop you like.

How?
By using shapes—combine squares, circles, rectangles and lines into anything you can imagine.
It’s a basic principle in design; that everything can be built using geometric shapes.
Like this sweet little scene, I’ve made out of simple shapes:

And, you’re not only limited to simple houses, bushes and suns.
No:
You can take it to the next level, and design a character of your own.
(Works best in the Contemporary style).

The “trippy” colors are just to show you, what shapes he consists of.
Of course, you want to color them like the standard Vyond guy on the left.
So, yeah, go crazy with shapes.
Use them to make changes to existing Props and Characters.
Or create your own from scratch.
There really is no limits.
A small tip:
Use Group and Mask a lot, when you do this.
Group things together to be able to move them around as one unit.
And Mask two shapes to integrate them. (Like the man’s mouth above—it’s a half circle and a rectangle masked together).
Ready for another advanced tip?
Split-Screen Magic
Another advanced technique is custom split-screens.
In itself, it’s not that hard.
You could just search the template library for “split”.

But, I often want to create these splits myself.
To control exactly what’s shown – and how things are sliding in.
SO:
What we want to arrive at is something like this:

First thing to notice is alignment between the elements.
Alignment?
Yes, notice how all the lines are synced between the two scenes.
The floor. The tables. The computers.
That’s to make it visually appealing.
(Next-level stuff, I know).
But it really DOES make a difference.
Take a look at this comparison between “great” and “not so great”:

You know what they say:
“The devil is in the detail.”
Which means; quality takes time and effort.
And if your two halves are disproportionate or misaligned, it just looks bad.
So:
Now we know how to make our scene LOOK great.
But how to make our scenes SOUND great, too?
That’s what I want to dive into in the next section!
Import Sound Effects and Music
True.
This is an easy move, for sure.
Topping up the libraries with extra sound effects and music.
But also one that raises the overall quality of your video a lot.
The standard Vyond sound effects are fine.

But if you want a bigger selection to find your favorites from, it’s just not enough.
For sound effects, I’ve bought a pack called “3000 Sound Effects”.

It costs around $30, but I think it’s well worth the small investment.
I went through the whole thing.
Found my 20-30 favorite sound effects.
(Mostly “pops”, “slides”, “wooshes”, “keyboard typings” and “clicks”.)
And uploaded them all to Vyond. Simple.
Besides upping your sound effects game, you also want to look into more and higher quality music than what Vyond’s standard library has to offer.

In the beginning, these tracks were more than enough for me.
But hey—this is the advanced section!
So:
Where do you find good (and maybe even free) music to import?
Here’s a few great sources:
1. Youtube Audio Music Library
Youtube Audio Music Library is a huge collection of constantly updating tracks for video.

Just make sure to check the copyright settings.
Sometime, you have to attribute the artist.
But, most of the music in there is free and copyright free.
2. Wistia’s Music Collection
Wistia also has an awesome Music Library (and it’s free).

I’ve downloaded all their albums and used them in many videos.
The track are often subtle, modern and allows enough room for a voice-over to be heard on top.
Most important thing:
Match your music to your video.
Don’t go all “ukele and whistles” on every video.
Try to think about the mood, style and context of your video.
Who knows—maybe you don’t need music at all.
If you choose to add sound effects and music in, you now know where to go find it.
CHAPTER 6:

Video Structure Fundamentals
Knowing animation is good.
But do you know WHAT to animate?
Laying the foundation for your video is key.
Without a strong script, your video is probably going to be difficult to understand.
It’s a skill that can be learned.
And in this section, I want to share my best insights on “script writing”.
Script Writing
Let me begin with a question:
Is it enough to have a great vocalist—in order to make a hit?
No, it’s very much about the SONG.
And similarly, it’s not enough to be a great animator—your video script has to be great too.
I’ve actually made a video about why a SCRIPT is such a good foundation for a video.
Let’s give it a spin:
As I say in the video, a script is the foundation on which you build your animations.
It’s your guarantee that you have a plan for your video.
That it has a solid structure.
And that you’ve taken the time to consider what to include as content.
In order to make things easy for you, I’ve made 3 script templates, you can use.
If you follow one of the templates, you are sure to have a proven and working format for your video.
Let’s get them on the screen:
1. The Fish
The Fish is based on a simple idea:
- Begin with an interesting Intro.
- Move on to a compelling Story.
- And round off with a strong Call To Action.
If you’ve ever done a presentation, slideshow or told a story, you probably recognize this structure.
Turns out:
It works great for explainer videos too!

Now, you may think: “Why would I need to structure my video like a fish?!”
Because it works.
“Front-load” your main point, so you dont keep people waiting. Then connect your main message to a story about someone or something to remember. And when you’re close to being finished; tell people what to do next.
To get some concrete examples, check out my lesson on The Fish.
It’s very simple in theory, but too seldom seen in practice.
Now:
Let’s look at another structure to build your video on.
2. The Better World
Here, we contrast something not-so-good with a “better world”, where your service or product or idea has lit up the lives of those using it.
It’s an easy way to create a “before and after”, where the transition between the worlds happens just when you’re concept is introduced.

So, if you want to tell a story about something that solves a problem or relieves a pain, The Better World is your foundation.
For a deeper dive, watch my video about The Better World.
That was 2 out of 3—let’s look at the last video script structure.
3. The USP Uzi
If you’re not that much into storytelling, The USP Uzi is going to be your friend.
The concept is that you briefly introduce yourself in the video, and then fire away with 5-8 Unique Selling Points about you.

Round off with a CTA (tell people what to do next) and you’re done.
Mind-blowingly simple, but it works.
Oh, one more thing:
If you want to learn more about script writing, I just released a brand new premium course called Strong Scripts.

Here, you’ll meet the 3 templates above, as well as a series of lessons on form, content and a good process around video creation.
Take a look at the course description here.
If it’s something for you, I look forward to seeing you inside.
If not, then you at least have some idea of what strong script writing can do for your video.
And you got the 3 script blueprints for how to arrange your message in a way that makes sense to your viewer.
It all comes down to simplicity:
How can you tell your story in a way that is logical to follow and easy to remember?
That’s the #1 goal with your script and video.
Conclusion
I hope you enjoyed my new tutorial on Vyond.
Now I’d like to hear from you:
Do you already use Vyond?
If so, what’s your favorite feature?
Let me know by leaving a comment below right now.

Join 2000+ educators
who took my free mini-course
When you join below, you get my free email class "Explainer Experts" on how to create high-quality, educational videos.
Author

Rued Riis
Owner
I love to learn and teach in a simple and entertaining way.

15% discount on paid plans

Claim your free extended trial
Popular Guides

Learn the basics of animation video (free).
Let me teach you some best practices around video creation in Vyond. It's a short and sweet mini-course that get's your hands dirty and kickstarts your learning journey!

65+ Vyond tips for eLearning professionals (free).
Get the "Teacher's Notes" workbook that comes with the course Scenarios in Vyond. These 65+ tips are guaranteed to teach you something new!

Tools I use
Powerful tools = everything. See what I use right now—for video, animation, courses, etc!
