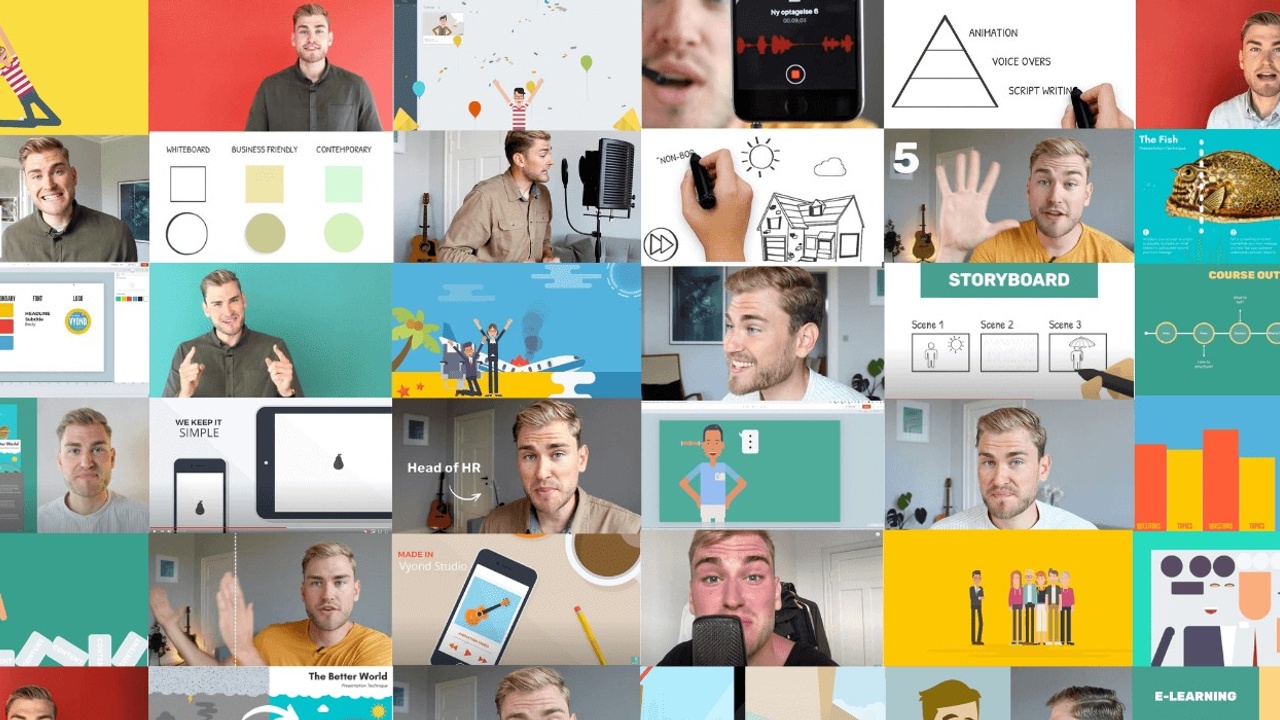
5 FREE Vyond Tutorial Videos [from an Expert]

This is your hub for Vyond tutorial videos to get you started in Vyond Studio. All tutorial videos are for free and created by an expert with 10+ years of experience in Vyond (me).
The Vyond training you need to cover is 1) the Vyond Studio interface, 2) basic functionalities and libraries, and 3) creative ways to use Vyond.
When you master all three introductory levels, you are ready to put your Vyond skills to use in your own context—and create complete animation videos in less time.
The video tutorials below are also available on my RuedRiis YouTube Channel. If you subscribe to it, you will get notified when I create new free tutorials on Vyond.
Vyond Studio Basics for Beginners
Vyond Studio is where you create animation videos in Vyond. If Vyond is the company, Vyond Studio is the tool. Here, you find a canvas, libraries with assets, menus for animating, and a Timeline that shows you your scenes.
Contents
Vyond Studio Basics for Beginners
How to Make your First Vyond Video
Vyond Whiteboard Animation Tutorial
How Long does it take to Create a Video in Vyond
Vyond Studio is created with an interface similar to other video software. If you've worked in Adobe AfterEffects, ScreenFlow, Windows MovieMaker, Camtasia, or any other editing tool, you'll recognize the layout of Vyond Studio.
But don't worry, Vyond is not as complicated to get an overview of and master as the advanced video tools. Vyond has 4 main areas and the functionality of each is limited to a few essentials to get you started quickly.
The Canvas
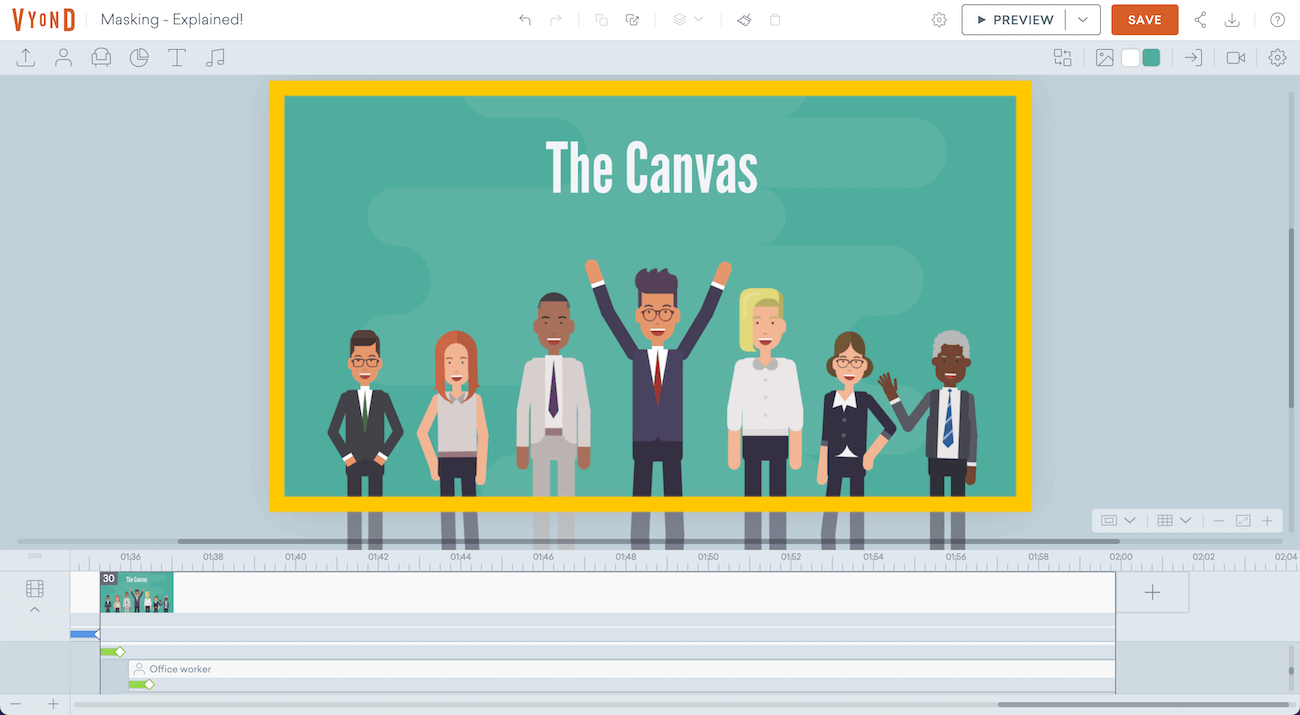
The canvas in Vyond is like the canvas you would use for painting. It's a big blank white space where you draw in assets and characters from the different libraries. It's where you compose your scene and make sure that the colors, texts, and actions are as you want them to be.
The Timeline
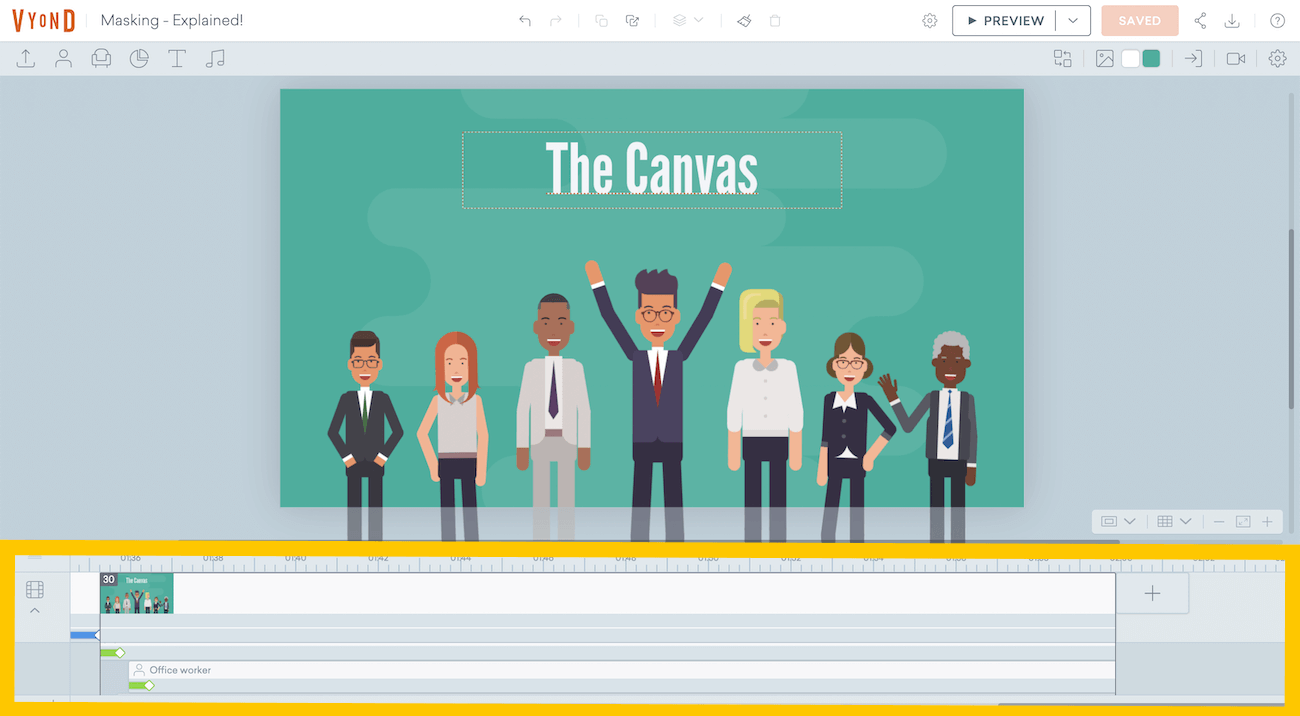
The timeline is where you can see the timing of all your enter and exit effects in individual scenes. As well as all the scenes you have in your entire video project so far. You can zoom in and out of your timeline to see details of individual scenes - or zoom out to be able to get the full overview of your entire video in one view.
The Libraries
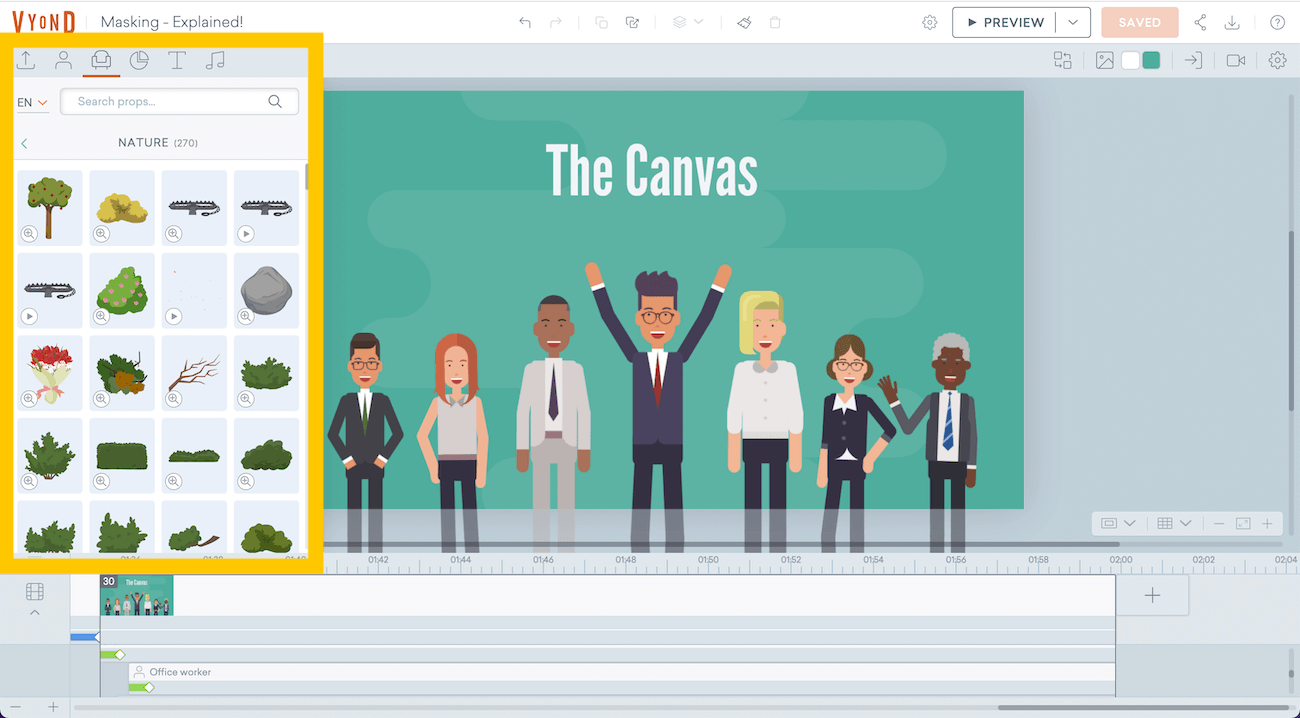
On the left side of the Vyond Studio, you find your libraries of props, characters, sound, text, and all other things you can put in a scene. You unfold the libraries by clicking one of the icons. This also allows you to search for that specific prop you want to put in your scene.
The Animations
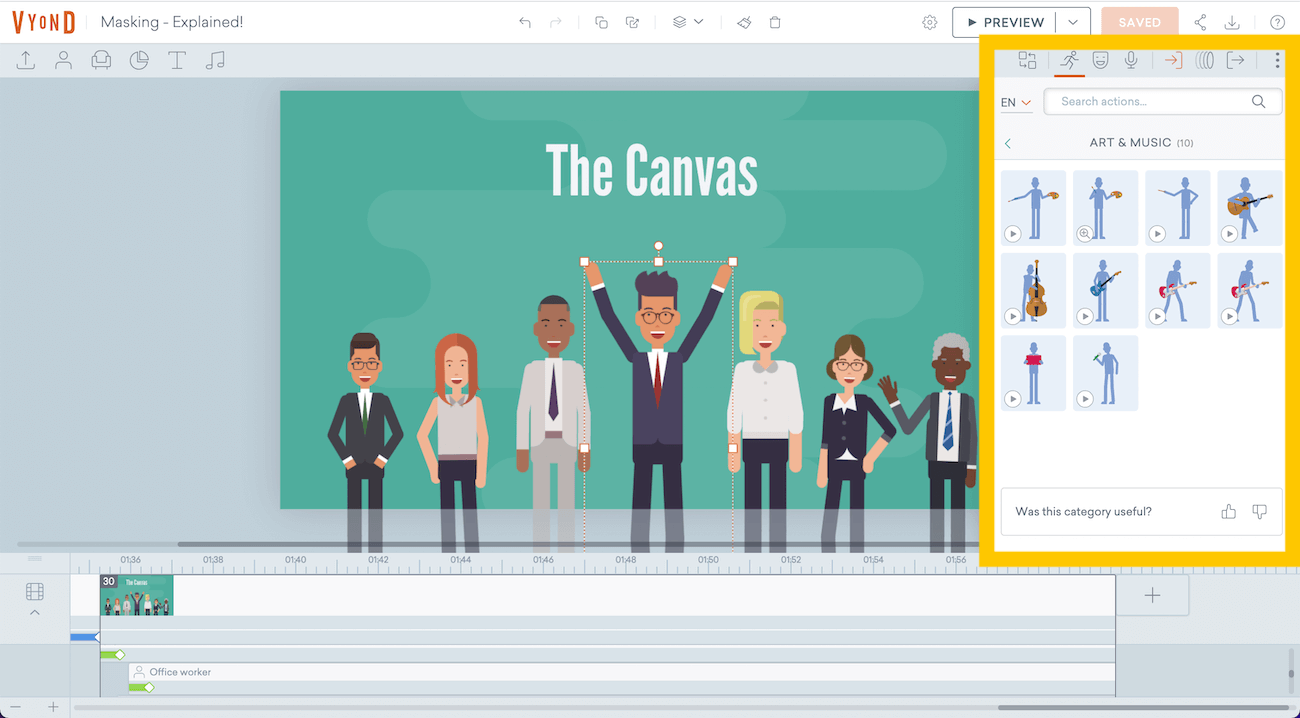
On the right side, you find the panels used to give life to your assets. You can add enter effects and exit effects to your characters and give them actions, facial expressions, and choose which direction they should be looking in.
This is where are you add motion paths to your assets to enable them to move from one side to another. You also find the option to crop your scene and add camera movement if you want to add a slight zoom in or zoom out.
How to Make your First Vyond Video
To create a new video in Vyond, you log in to your account and click the top-right button that says "CREATE A VIDEO". You can choose a format, horizontal, square or vertical, and the default is horizontal 16:9.
Hereafter, you load Vyond Studio, which opens up the Canvas, Timeline, Libraries, and Animation panel from which you create your first couple of scenes — and eventually your full video.
When you master the basics you are ready to create your first animated scene. In this video tutorial, you learn how to create a scene about a man who makes a scene. Very meta.
Not all Vyond subscriptions include the contemporary animation style and if your subscription doesn't it's totally fine to use the business-friendly style.
One of the first things you want to learn is to create a new character. This is done using the inbuilt character creator that opens up a new interface.
At first, this might be a bit confusing but after a while, it starts to make sense why the character creator is a separate tool outside of Vyond Studio.
All the small tips and tricks you learn in this Vyond video tutorial are components that make you able to craft complete scenes and whole videos further down the line.
It's the fastest way to learn a new tool to follow along step-by-step and afterward start to apply the learnings in your own context and to your own projects.
If you are interested in taking my full Vyond training you can enroll in my paid course, Go Beyond Vyond.
Vyond Whiteboard Animation Tutorial
Whiteboard animation is one of Vyond's animation styles, and it lets you create instructional and fun videos that look like they are hand-drawn on a white canvas.
The main difference between whiteboard animation and other animation styles is the aesthetics. The look of the whiteboard style is clean and simple and looks like it's a hand-drawn endeavor - although every drawing path is computer programmed.
The whiteboard animation style saves you time because all the assets and characters that are added to the canvas will automatically be hand-drawn. This means that there is a default Enter effect attached to all assets that are added to a scene.
You can change the Enter effects and Exit effects of every asset but it is the whiteboard hand draw enter effect that makes the most sense for this animation style.
The whiteboard animation style is typically black and white although you have the option to change the color of both the background and stroke used to draw all assets.
This animation style is often used in instructional videos where branding is less important and simplicity is the most important factor. The white and black colors rarely interfere with the brand colors of the company using the whiteboard animation video.
To watch all the characters come to life through a drawing pen is also a hypnotizing effect that makes the video more engaging and ensures that the viewer watches more of the video and learns more of the topics covered in the video.
How Long does it take to Create a Video in Vyond
A complete video made in Vyond takes a beginner 4-5 days, an experienced animator 2-3 days, and an expert 1 day. This includes scriptwriting, voice-over work, and animation.
If you wonder why Vyond states you can make a complete video in hours or even minutes, it's because they suggest heavy use of scene- and video templates.
You can definitely piece together a complete video in less than 2 hours, if you build on a foundation of Vyond templates, know how to align colors, and swap assets quickly.
Step 1 of creating an animation video is to write a strong script. This is where you pitch your concept, tell your story, present your selling points and suggest an action for your viewer after they've watched your video.
Step 2 of your video process is to narrate your script as a voice-over. You can do this yourself if you have good gear, you can ask a colleague who has a likable voice, or you can hire a professional voice-over artist to narrate your script for you.
Step 3 of your creative process is the actual animation work. This third step is where you will spend the most time throughout the creation of your animation video. That's also why your scriptwriting becomes important, as it takes time to visualize every sentence written.
If you want to speed up Step 3 of your process, the animation work, here is a list of concepts you need to master:
- Learn to Swap assets so you can replace a Prop or Character without losing their size, position, and animations.
- Learn to align colors, so you can make a series of unrelated scene templates look like they are connected and form a cohesive story.
- Learn to let the voice-over lead the way and give you ideas for what to put in your scenes. Use keywords from the script to find relevant Props and Templates.
If you want more tips on how to drive your creation process forward without any roadblocks, you can download my workbook '0 to Finalized Video' for free.
How to Create Animations for your Recorded Video
You create animations for your recorded video by exporting the sound file from your video, uploading it to Vyond and listening for the right timing and content for the scenes, you want to animate. When finished, export the animations and add them to your video project.
This is a different type of Vyond video tutorial, as I show my exact workflow with very little editing involved.
I record my screen as I work through the creation of Vyond animations for my own recorded video format.
As you'll learn, it's important to first have your footage in place and edit it into a first draft of the video. Then you export the sound from it and use that sound to guide your animations.
In Vyond, I use sound to guide me in finding the scenes that I want to be animated, and not talking head. Preferably, you have decided which format you want for every sentence before you start shooting anything.
After I've animated all the scenes that I want to have as animations, I export the video and import it into my video editing software, which is typically ScreenFlow.
You can see all the tools I use on this dedicated page.
Professional Vyond Training Course
I created these Vyond video tutorials to get you started with animation. If you want to move beyond the basics, I offer a professional Vyond training course called Go Beyond Vyond.
In addition to this course, you can also enroll in my bonus course made specifically for educators, which is called Scenarios in Vyond (part of Go Beyond Vyond☝🏻).
Here you learn to establish contexts, build scenes, work with emotions and facial expressions, and much more related to storytelling and scenario-based learning.
A smart way to get access to all the Vyond training I have to offer is to get an All-Access Pass. This opens up all my courses and lets you see the red thread across the courses.
For the ambitious students who have been through all Vyond tutorials, training courses and watched every YouTube video, I've made - I still have something in the bank; Explain Academy.
Explain Academy is a premium program that lasts 6 weeks and teaches you communication skills and content creation skills. We go a couple of steps deeper than Vyond and learn what it takes to create engaging digital content with simple tools.
Get on the waitlist to get notified when enrollment opens up again. It only happens a couple of times per year, and the seats are first-come, first-serve.
Join 2000+ educators
who took my free mini-course
When you join below, you get my free email class "Explainer Experts" on how to create high-quality, educational videos.
Author

Rued Riis
Owner
I love to learn and teach in a simple and entertaining way.

15% discount on paid plans

Claim your free extended trial
Popular Guides

Learn the basics of animation video (free).
Let me teach you some best practices around video creation in Vyond. It's a short and sweet mini-course that get's your hands dirty and kickstarts your learning journey!

65+ Vyond tips for eLearning professionals (free).
Get the "Teacher's Notes" workbook that comes with the course Scenarios in Vyond. These 65+ tips are guaranteed to teach you something new!

Tools I use
Powerful tools = everything. See what I use right now—for video, animation, courses, etc!
